Pimer2 - An improved visual timer for your Raspberry Pi
We recommend using the new driver free based scripts for LedBorg.
The new driver free examples can be found here, the installation can be found here.
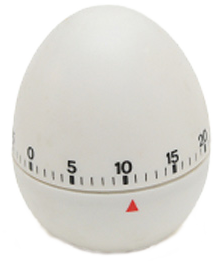
We had a simple Raspberry Pi egg timer before, Pimer, but what it lacked was a way of seeing how long is left to go.
We figured it would be good to use LedBorg more like a proper egg timer and give an indication of how long is left to go.
We decided to use our previous colour coding to represent how long we have waited:
| <=11% | <=22% | <=33% | <=44% | <56% | <67% | <78% | <89% | >=89% |
The improved version is Pimer2.py, a Python script which takes a time in seconds and counts down in colours until time is up.
There are a few variables in the scripts you may wish to set to change options:
coloursDone- Line 19, colours to cycle through when done, we have gone for flashing red but the sequence could be anythingdoneDelay- Line 20, time in seconds between changes when done, make it flash faster or slower
Here's the code, you can download the Pimer2 script file as text here
Save the text file on your pi as Pimer2.py
Make the script executable using
chmod +x Pimer2.pyand run using
./Pimer2.py time_to_measure
#!/usr/bin/env python
# coding: latin-1

# Import library functions we need
import time
import sys
import threading

# Make a function to set the LedBorg colour
def SetColour(colour):
    LedBorg=open('/dev/ledborg','w')
    LedBorg.write(colour)
    LedBorg.close()

# Set up our temperature chart, from ages to nearly done
colours = ['002', '012', '022', '021', '020', '120', '220', '210', '200']

# Setup for colour changing
coloursDone = ['000', '200']            # Colour cycle when done
doneDelay = 0.5                         # Time between updates in seconds when done

# Class for the user interaction thread
class WaitForUser(threading.Thread):
    # The code which will be run when the thread is started
    def run(self):
        global waiting
        # Wait for the user to press enter
        tempString = raw_input()
        # Set the waiting flag and finish
        waiting = False

# Get user input
if len(sys.argv) > 1:
    try:
        delay = float(sys.argv[1])
    except ValueError:
        # Not a valid number
        print '"%s" is not a number!' % (sys.argv[1])
        print 'Usage: %s time_in_seconds' % (sys.argv[0])
        sys.exit()
else:
    print 'Usage: %s time_in_seconds' % (sys.argv[0])
    sys.exit()

# Setup status flags
global waiting
waiting = True

try:
    # Make sure we are using floats
    doneDelay = float(doneDelay)
    delay = float(delay)
    # Calculate the time period of each colour segment
    segmentDelay = delay / float(len(colours))
    # Display each colour in turn
    for colour in colours:
        # Set the relevant colour
        SetColour(colour)
        # Wait a while
        time.sleep(segmentDelay)
    # Setup a thread to wait for user input
    print "Time's up!"
    print 'Press ENTER to stop the timer'
    WaitForUser().start()
    # Cycle the LedBorg through the done sequence until stopped by the user
    while waiting:
        for colour in coloursDone:
            # Set the relevant colour
            SetColour(colour)
            # Wait a while
            time.sleep(doneDelay)
            # Finish early if we have been stopped
            if not waiting:
                break
    # Turn the LedBorg off
    SetColour('000')
except KeyboardInterrupt:
    # CTRL+C exit, turn off the LedBorg
    print 'Terminated'
    SetColour('000')